Overblog
Follow this blog Administration + Create my blog
August 12 2012 7 12 /08 /August /2012 00:20

Warning: Bromates are suspected carcinogens. Limit exposure to them. They are also strong oxidizers. Keep away from combustible materials. Bromine is smelly and toxic in large quantities. Perform this reaction outdoors.


You will need: Source of potassium (No Salt salt substitute, Spectracide stump remover, etc.), bromide reserve for spas (sodium bromide), a carbon rod, a wire of any sort, a five volt power supply, and some connecting wires.


Boil some water and dissolve quite a bit of sodium bromide in it, though not enough to make a supersaturated solution when cooled. Anchor the carbon rod and the bit of wire to the sides of the chosen electrolysis container and pour the hot sodium bromide solution in. Attach the positive electrode of the power supply to the carbon electrode and the ground to the wire. Begin electrolysis.


A brown solution of elemental bromine will begin forming at the carbon electrode (anode), while a colorless solution of sodium hydroxide will begin forming at the wire (cathode) (net reaction 2 NaBr + 2 H2O --> 2 NaOH + H2 + Br2). The hydrogen escapes as a gas from the cathode. When sloshed around, these two solutions will react to form sodium hypobromite and sodium bromide (2 NaOH + Br2 --> NaBrO + NaBr + H2O). Because of the heat, the sodium hypobromite will disproportionate into sodium bromide and sodium bromate (3 NaBrO --> NaBrO3 + 2 NaBr). All of the sodium bromide will reenter the reaction at the beginning.


When bubbles begin forming at the anode at a significant rate, this means that much of the sodium bromide is exhausted. Stop the electrolysis and filter the solution to remove the carbon particles. What remains is a light yellow solution of sodium bromate, bromide, and hypobromite. It smells just like household bleach, just with chlorine instead of bromine. Heat it to disproportionate the majority of the remaining sodium hypobromite, then let it cool. When crystals begin forming (it may take several days of evaporation), add some potassium salt solution and stir to dissolve the crystals. They should dissolve but new crystals should take their place over time. These are crystals of not-so-soluble potassium bromate. Wait until no more crystals form and then remove them. They should be quite pure and white. The remaining solution contains some bromate in solution as well, but it is quite impure. When I tried this, the yield was not spectacular, but the resulting crystals were good. You can use them as an oxidizer or a source of reactions involving bromine oxyanions.


Potassium-bromate.JPG 

Share this post
Repost0
August 6 2012 1 06 /08 /August /2012 21:33


WARNING: THIS ARTICLE IS EXHAUSTIVE AND THEREFORE MONOTONOUS. PROCEED WITH SPEED.


In this article I will describe the history of my personal experiences with chemistry. My extracurricular study of chemistry has covered much ground since I started performing experiments about four years ago. Like many people, my very first experiments involved kitchen chemistry. Strangely, I never performed any kitchen chemistry reactions until my teenage years. Before that, I only read about chemistry. Obtaining chemicals of any form always seemed like a distant fantasy, so I contented myself with reading science books and dreaming about myself as a scientist. Using these books, I learned about the periodic table and memorized many of the elements and their properties and uses. In one of the books, I noticed a description for a homemade hydrogen generator and became fascinated by it. Producing my own flammable “helium” balloons from scrap metal and a common acid had to be magic. However, we did not have chemicals such as muriatic acid and zinc strips, so I could only theorize. This was tacitly encouraged by my parents, who like all parents did not want me hurting myself with caustic chemicals but did not mind me spending all of my free time studying and learning. However, I had become curious, and it is hard to stop a curious child.


I accidentally discovered a chemical reaction; baking powder fizzes when mixed with water. This fascinated me, as I had believed that chemical reactions can only be performed in labs and that they were all dangerous. I wanted to step it up a little, though. I had heard much about the reaction between baking soda and vinegar from science books and decided to try that. I was even more surprised at the reaction than I was at the previous reaction, but, illustrating my current chemophobia, I still believed that the resulting product, sodium acetate, was toxic because it did not have a household name. I assumed at that time that I had completed all of the reactions possible with household substances as my parents told me that everything else was too dangerous to play with.


To increase my chemical knowledge, I began searching Encarta® Encyclopedia for chemicals. The small amount of information present about chemistry only made me search harder than ever, so I then decided to search online for random chemical compounds that I saw in textbooks. I soon found that Wikipedia was almost always the top result in these searches. I decided to check out the extent of Wikipedia’s chemical information and was dumbfounded by the number and size of the articles on chemicals and chemistry. For several months after this, most of my free time was spent taking painstaking notes from Wikipedia chemical articles and learning as much as I could about the few chemicals and elements I knew. I filled several notebooks with chemical information, drawings, and data about basic inorganic compounds and elements. Despite being able to find excellent data on the chemicals, these articles only described laboratory methods of synthesis, so I still did not have an idea on how to make any of these mysterious substances which were so different from the materials I had seen all of my life. Because I was planning to take chemistry in my junior year, I had purchased a chemistry textbook. To further increase my knowledge, I thoroughly perused that book, reading through it about a dozen times. Because I read the book so many times before taking the course to glean every bit of chemical information I could get, I got almost a perfect A+ with practically zero effort. That was only the beginning of the rewards I got for pursuing amateur chemistry as a hobby.


My introduction to genuine chemistry experimentation itself was gradual. I became fascinated with electrolysis over time. Since I heard only water and electricity were necessary to obtain an explosive mixture of gases (including hydrogen, my earlier dream), I decided to give it a try. I was disappointed with the performance of pure water. Even at 24 volts DC, the electrolysis occurred so slowly that I could hardly notice anything. I then read that electrolytes could be used to speed up the reaction. I added vinegar and used longer copper electrodes to provide more surface area. A green coloration appeared in the solution and bubbling was happening quite rapidly. The solution heated up and the smell of vinegar became strong. I added salt and the reaction improved even more. However, I noticed that all of the gas was being produced at the negative electrode while nothing but green slime was being made at the positive electrode. This colorful slime got the attention of my sister, who began a course of electrolysis experiments on her own. She used salt and copper and got “yellow water” (microcrystalline copper(I) oxide), while baking soda and copper got “green water” (basic copper carbonate), and Epsom salts and copper got “blue water,” (copper sulfate) named because of the colors produced. I became curious as to the composition of the precipitates/solutions and how they were formed. I then discovered that iron makes a green-gray precipitate which turns brown over time, and this metastable substance only made me more interested. A science kit I received as a gift required copper sulfate for most of the experiments in the chemistry section, and I was desperately looking for a source of this material. When I tried to form “blue water” and obtained a white precipitate at the cathode, I decided to research this reaction. I discovered that magnesium hydroxide was being formed, and the magnesium was being replaced in solution by copper. The solution turned bright blue and I stopped the electrolysis only when copper was falling out at the cathode as fast as it was dissolving at the anode. Upon evaporation, I got a blue solid that turned green on exposure to air (it lost some of its pentahydrate). I performed some experiments with this copper sulfate but was somewhat disappointed that it was only about 15% pure. Another more successful experiment I did was the heating of sodium bicarbonate to obtain sodium carbonate, also in the science kit’s chemistry section. This was done in a kitchen pot which was blackened on the outside much to my mother’s disapproval, although I kept trying to persuade her that the pot was fine for cooking. This began my synthesis craze.


I continued expanding my Wikipedia research and performing new syntheses of compounds. I electrolyzed iron in Epsom salts to form iron(III) sulfate. I electrolyzed lime in water and nothing happened. I also began finding more household sources of chemicals. I extracted potassium hydroxide from an alkaline battery and (unknowingly) converted it to potassium carbonate by long standing in air. I created sodium hydroxide from the chloralkali process and zinc acetate with modern pennies and vinegar. I formed copper(II) oxide by electrolyzing copper in sodium bicarbonate solution and heating the precipitate formed, although I did not know what to use it for. My room was constantly filled with new experiments almost exclusively in the aqueous state. Because I had no source of fire, my only way to form crystals was to evaporate in an open pan. This made my bedroom a very humid place, filled with all kinds of strange metallic smells. This caused my parents to relocate my chemistry lab in the basement, where I realized that storing chemicals in the individual compartments of an egg carton (my portable chemical shelf at the time) is inferior to storing them in closed paint mixing containers. However, I still had only a small amount of starting point chemicals. Then came my first glimpse of a genuine chemistry kit.


My pastor had an old chemistry kit belonging to his son and kindly donated it to me. The kit was designed for a middle-school scientist and being a junior in high school I found the experiments themselves quite uninteresting. The chemicals, however, were a completely different story. Chemicals that I have never heard of – phenolphthalein, protease, and copper(II) chloride – as well as those that I have read about but never expected to see until college – cobalt chloride, copper sulfate, zinc sulfate, silver nitrate, ammonium chloride – I now had in my possession. I began to do a huge array of experiments involving these new chemicals, wasting most of them. Suddenly, formerly abstract reactions from Wikipedia became intriguing realities as I continued to explore the wonderful world of chemistry. A significant number of glassware also came with the kit, which turned out to be the most useful portion of it. I still lacked many basic chemicals, but finally a school project gave an excuse to purchase them.


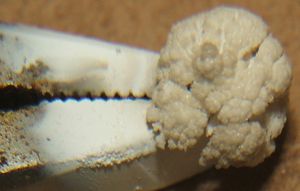
Due to my chemistry craze, it is no wonder that I decided to use chemistry for my science project, which was entitled “The Catalytic Decomposition of Hydrogen Peroxide.” I prepared a huge list of catalysts that would be mixed in equal weights (if possible) with a fixed volume of hydrogen peroxide. The oxygen production after a certain length of time is measured and recorded and the results compared. I intentionally added certain catalysts such as tincture of iodine, ammonia, and muriatic acid for the dual purpose of observing their catalytic effects and adding such valuable reagents to my chemical stockpile. The science project was a success, with several general trends visible on the periodic table and a whole new host of experiments opened to me. I was finally able to perform the cobalt chloride equilibrium with hydrochloric acid in my textbook and numerous other experiments, as well as restock critically low chemicals like copper(II) chloride (by dissolving CuO in HCl). These colorful and wonderful reactions made me think of using my camera to begin recording reactions. My first pictures were poor quality, but they steadily increased in quality as I learned how to take macro pictures. I then got a new camera and began taking videos as well as high-resolution pictures. Some of my first photographs were of flame tests, which were done on my parents’ old but only kitchen stove. I remember promising myself never to burn lead powder on the kitchen stove anymore as it produces a spectacular grayish flame but toxic red smoke. However, the only reactions I knew were only the ones that I stumbled upon or found on Wikipedia. Therefore, I did not know how to dissolve metals like lead, as I never suspected a 1 M solution of a very weak acid like vinegar to dissolve a relatively inert metal like lead with any reasonable speed. I heard the Romans had to wait months for their lead pots full of vinegar to accumulate enough atmospheric oxygen to produce a significant amount of lead acetate, which they used as a calorie-free sweetener. However, there were many metals that I could dissolve, many precipitates and complexes to be formed, and many mysteries to be sorted out with the unknown compositions of impure household products like magnets.


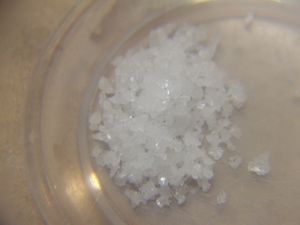
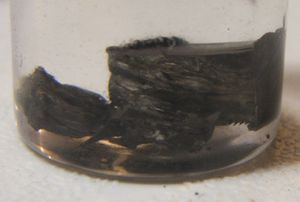
Ever since, I have expanded my range of experiments steadily. I found the wonderful forum Sciencemadness, and discovered a whole world of amateur experimentalists who have created processes for synthesis that were designed for chemists like me. For example, using some of this newly found information, I purchased bismuth and dissolved it in hydrochloric acid and hydrogen peroxide. I was quite happy to finally have bismuth chloride from which I could do the hydrolysis experiment featured in my chemistry textbook. I also extracted lithium (my first sight of a metal more reactive than aluminium) from a lithium battery and reacted it with water. I also found W. Oelen’s great site, which has a large number of riveting experiments, complete with high-quality videos and stunning photographs. I discovered how to dissolve lead (hydrogen peroxide and acetic acid) and did several experiments with it. The iodide of lead was an especially intriguing compound. (You can see some of my experiments on the YouTube channel LanthanumK or on this blog.) I also found out that placing a magnifying glass in front of my camera lens while taking photos drastically increases the quality and zoom level of the picture or video. I use this tactic for most all of my macro shots now. But all of my experiments have not been good.


I have gotten several temporary bans and restrictions on my experimentation due to chemistry epic fails. I electrolyzed tincture of iodine in my room, and the heat of the electrolysis evaporated much of the iodine and filled my room with fumes of iodine when I was sleeping. I woke up the next morning with a headache and a foggy feeling. That resulted in my chemistry being relocated again to the lower level of the house as it had gradually shifted back into my bedroom. Halogen strike one. Once I placed the manganese dioxide from a dead battery in hydrochloric acid. Very little chlorine was released, and it was barely noticeable in the indoor environment. Incorrectly deducing that a dead alkaline battery equals a charged one, I placed the manganese dioxide from a charged battery in hydrochloric acid in my mother’s hobby room (where I did my chemical experiments at the time) and filled the room with chlorine gas. Unfortunately it was my mother who walked in before me and got an unpleasantly strong but not suffocating whiff of chlorine gas. The solution was placed on top of a white surface, which was covered with black manganese dioxide stains after that due to splattering during the reaction. This resulted in a several-month break, my halogen strike two. Then I made some bromine water with bleach, sodium bromide, and hydrochloric acid, and poured it down a sink drain without dilution after some experiments. My sister bent over the sink and got a whiff of bromine vapors that allegedly gave her a headache. This was halogen strike three. I now respected the halogens much more than I previously did. Fortunately, my parents did not know that I made the same error, releasing halogen vapors indoors, three times in a row. I hope I get to work with fluorine someday, as this is the most fascinating of the halogens. Another time I drilled a hole in a lithium battery extracted from an EZ-Pass device. I should have researched why the battery voltage was 3.6 V instead of 3.0 V (like a normal lithium – manganese dioxide battery) before opening. Anyway, I drilled out the center carbon electrode and removed a smoking drill bit along with a smell of burning matches. I thought that I had caused a short and that the battery would catch on fire and explode or some bad thing, so I dunked it in water (bad move with any lithium battery). Fortunately, only a small amount of thionyl chloride – yes, this was a lithium thionyl chloride battery – could leak out at a time, but I still ended up stinking up my parents’ kitchen with a sulfur dioxide / hydrogen sulfide smell. After this, I decided to dismantle a partially charged nickel metal-hydride battery. I peeled back the coating without shorting out the jelly roll and took out the electrode materials, placing them on a metallic surface. This metallic surface was both my saving and my undoing. What happened was partly due to the metallic surface forming a short, aerial oxidation of the hydride material, and improper contact of the electrodes. I was busy somewhere else in the room when I noticed a light coming from the battery and looked up just in time to notice the battery igniting. Not knowing what would happen if the battery was allowed to burn, I immediately smothered it with a metal case of drill bits. (Out of the two more NiMH batteries I opened, two of them ignited upon opening as well.) Due to these types of experiments, my chemical lab ended up in the garage, where I accidentally vaporized some selenium and filled the garage with a fecal smell that I was sure was toxic. Heating the deposited selenium on the floor in an attempt to vaporize it did not help matters. This did not result in a ban as I was able to clean it up with bleach, a selenium oxidizer that can handle gray as well as red selenium. Another time I wanted to see whether the sodium atoms from celery would be visible in a flame test and filled the kitchen with a horrible smell of burning celery, which caused my parents to strongly discourage my use of the kitchen stove.


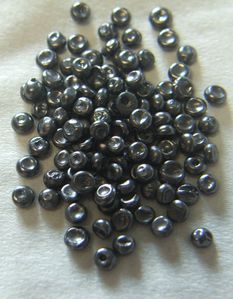
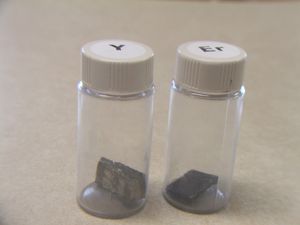
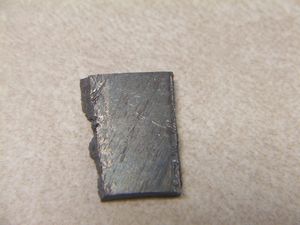
During one of these bans I wondered how many pure elements I had. I counted quite a few that I had on hand and quite a few that I was sure I could make. Thus began my element collection. I rigorously searched household materials for elements until I accumulated about 50 of them, then began purchasing and isolating a few. I have spent about 80 dollars on elements so far, mostly from Gallium Source. Contact me and I will give you my 90-page description of my element collection. You could also check in the archives of this blog for articles on how to obtain elements. I will give you tips and tricks on how to obtain individual elements if you ask me.


I decided to begin posting my experiments online on this blog to gauge reader’s responses and interest. I got a significant number of page views (over ten thousand so far), much more than I got for a generic blog that I also worked on. For a while I was posting two articles a day, but declined lately due to work and school. I am trying to work on posts when I get the time and hope to be coming out with more posts in the future.


I learned several lessons over my years in chemistry. One is “research before reacting”. A well-informed chemist can make split-second decisions regarding a runaway reaction or a smelly one without having to worry about uncertainty. When my sodium bromate reacted with hydrochloric acid to produce a cloud of brown bromine fumes, I immediately took it outdoors because I followed this rule. Another would be to regard other people’s noses. That acrid smell that you may not find annoying may irritate other people, and that is not an option. A third would be to use small quantities of reagents at first. Using large amounts of chemicals and accidentally contaminating or hydrolyzing it can be one of the biggest disappointments, especially if the chemicals were expensive.


I hope my readers learn something from this rehearsal of my experimental history. Be sure to stay safe but not sanitized. Experimental chemistry needs a touch of the unknown, puzzling, beautiful, dazzling, and even the noisy to be an interesting hobby for most ages. It cannot be a computer simulation, no matter how good they are. For me, it has guided me in the easy choice of a major, aced me through several classes, saved much study time, given me inspiration for my blog and YouTube channel, and decided the way I have spent much of my free time. Enjoy studying the building blocks of the universe at your desired level.


Share this post
Repost0
July 14 2012 6 14 /07 /July /2012 21:15
 
Flash powder is a pyrotechnic mixture that, when ignited, burns with a bright flash. The reaction happens so rapidly that the powder seems to disappear after ignition. This mixture is often used in fireworks due to its ability to explode when confined. The most common flash powder is aluminium – potassium perchlorate mixture. However, perchlorates are not readily accessible. A less spectacular but more available composition is magnesium – potassium nitrate.
 
Course magnesium powder can be easily made from a file, muscles, and a magnesium bar. I obtained my magnesium bar from a camp fire starter, which generally costs about 10 dollars. There may be a cheaper source for large magnesium chunks. The shavings are approximately 100 microns across when ground properly. Potassium nitrate, also known as saltpeter, is also readily available. Some fertilizers use this ingredient to supply nitrogen and potassium, two essential plant materials. It is also an important ingredient in black powder. The best source of pure potassium nitrate that I have found is Spectracide® stump remover. This comes in fine white crystals which may be ground further if desired but still make a good flash when whole. A one pound bottle of the stuff costs about six US dollars.
 
I mixed the potassium nitrate with the magnesium powder in a 1:2 volume ratio. There is an excess of magnesium in this reaction, but that is fine. (If you want to make a more powerful flash powder, use stoichiometric quantities and fine powders.) The reaction of the two chemicals is probably this one:
 
5 Mg + 2 KNO3 => K2O + 5 MgO + N2
 
My first flash powder experiment was a success. I ignited it with a magnesium fuse and it burnt with an extremely bright flame, producing a cloud of white smoke. The nitrogen gas blows the reaction mixture apart, making the chance of embers quite small. The heat is intense, however, and it could easily ignite a flammable base, e.g. grass. Caution must be observed because of the heat.
 
 
Then I tried igniting flash powder in a test tube. I was curious whether the containment of a test tube would cause the flash powder to explode. To do this, I created an extremely long-winded and fragile ignition setup. First of all, I made a titanium igniter. Titanium has a higher resistance than quite a few other metals and so heats up easier when current is applied. Even better, a thin titanium strip will ignite when heated. Wires are tied to two ends of a thin piece of titanium foil and the wires are hooked up to two nine-volt batteries in series. The load resistance is about 1 ohm at first. This means a huge current spike as the nine-volt batteries heat the titanium, which decreases as the titanium becomes red-hot and is cut off as the titanium ignites and burns to the non-conductive titanium dioxide.
 
 
I used this titanium to ignite a pile of coarse magnesium powder and calcium pieces. The calcium was added in the hope of increasing the strength of the burning magnesium powder. Then a wooden splint, one half of which was soaked in potassium nitrate solution, was placed in the bottom of the powder pile. On top of it laid a magnesium ribbon which ran directly into a test tube filled with the flash powder mixture. The test tube was on its side.


It did not work as I expected. The ignition pile ignited when the current was applied, but I used the file to make the majority of the pile and it blew away before igniting the magnesium ribbon. The calcium did not have any significant effect. The wooden splint ignited however, and the nitrate – soaked section burnt up. The magnesium appears to have oxidized, although the bright white flame of magnesium is not seen. Once the splint passed into the unsoaked portion, the flame extinguished due to the wind and the heat removal by the brick. The reducing fumes produced by the extinguishing put out the magnesium for good, about 2 inches from the flash powder.
 
I decided to remove everything except the magnesium strip and light it using a propane torch. The test tube was standing upright in a holder. The force of the flame from the propane torch melted and bent the strip over the edge of the test tube, invisible to me. When I applied more heat, it ignited in the middle and instead of burning toward the flash powder, it burnt along the outside edge of the test tube, making a black charred spot. I took video of this but since it is boring the video was deleted.
 
I then laid the test tube on its side and tried ignition. The magnesium burnt up and hit the flash powder inside the test tube. The test tube was immediately melted and ripped open on the top, leaving just a small chunk of black plastic behind. The flash powder burnt brilliantly, even in the broad daylight, throwing flame and sparks around for an entire second. If the powders were fine it would have been gone almost instantly and the test tube would have exploded. However, due to the large number of fails, I forgot to turn my camera on and my biggest flash powder combustion event went unrecorded.
 
My brother got interested in flash powder and decided to make some himself. He ignited it with a wooden splint. He said that it was hard to see for a minute after ignition.
 
 
I then assembled a flash powder module. A small amount of flash powder is placed on some duct tape and a titanium igniter is placed inside. It is ignited using an 18V nickel – cadmium battery pack. The duct tape melts by the igniter, but the flash powder does not go off. I make a slit in the duct tape and the flash powder ignites. Therefore, the ignition of the titanium is necessary for the flash powder to deflagrate. To help this out, I wrap the flash powder in filter paper. The wires are connected to a long power cable which is hooked up to the 18V battery pack. A water bottle cap is placed on top of the paper construction to determine the effects of the blast. Ignition happens instantly, and the burning water cap is thrown 5 feet.  This shows the danger of being too close to the deflagrating mixture. Small amounts of smoldering paper are left behind.
 
 
At this stage, my flash powder modules are becoming too close to fireworks, which are illegal to use in NJ. Therefore, I will quit my experimentation with Mg – KNO3 flash powder for now.
*hiatus*
After a couple of months, I decided to make Zn - KNO3 flash powder. I ground up a piece of zinc from a carbon-zinc battery on a file and mixed the fine powder with potassium nitrate. The mixture ignited with difficulty. The zinc tended to melt at first, then suddenly combined with the potassium nitrate, making a dim green flash. This is expected because zinc is a much less flammable and much less reactive metal than magnesium.
 
Then I tried to coat a wooden splint in glue and magnesium - potassium nitrate flash powder. I hoped that when the splint was ignited, the flash powder would behave as a sparkler. Unfortunately, the nitrogen produced during the flash powder reaction tended to immediately extinguish the wooden splint, making reignition necessary. I hope to try using potassium bromate/chlorate as the oxidizer in the future as it seems to produce much less gas.
Share this post
Repost0
July 1 2012 7 01 /07 /July /2012 02:31

There are a large variety of chemicals that can be obtained for use in cleaning and disinfecting pools and spas. These can often provide a good source of chemicals to the home experimenter.


Chlorine shock or chlorine pool oxidizer is calcium hypochlorite, typically from 48 to 65%. This can be used for generation of chlorine gas. Household bleach, a dilute solution of sodium hypochlorite, tends to dissolve most of the chlorine formed when hydrochloric acid is reacted with it. The higher concentration in the calcium hypochlorite allows for the more efficient production of chlorine gas. The remainder is probably inert calcium chloride which does not significantly enter the reaction. Household bleach also has sodium chloride in it due to the similarities of the reaction.


Several chemicals are used to increase the pH or alkalinity of a pool. The most common is pure sodium carbonate. This chemical is useful for precipitating metals as their carbonates. (Sodium bicarbonate may be a better choice for neutralizations and some reactions.) It might be better, though, to buy sodium carbonate as "washing soda", or to simply heat sodium bicarbonate in an oven at 300 degrees Fahrenheit to form the carbonate. To increase alkalinity (and not pH), sodium bicarbonate is used.


To decrease pH, sodium bisulfate is the most common modern chemical. This is slightly more expensive than sodium carbonate, but is quite useful as an alternative to sulfuric acid in beginner chemistry. Hydrochloric (muriatic) acid is also used, although it has fallen into disfavor due to the fumes it releases. This might be easier to find in a hardware store for experimental purposes. Buffered forms of muriatic acid are impure and unsuitable for most experiments. However, it is still possible to find traditional 31.45% muriatic acid to decrease the pH of pool water. Sulfuric acid is also used to decrease pH.


Potassium persulfate (Oxone) is used as a non-chlorine pool shock. The purity is disappointing, only about 33%. However, this is still fine when qualitative oxidation is only necessary. Purer forms of persulfates may be available as etchants.


Sodium bromide is available from two sources. It is sold as a spa bromide reserve in the form of pure crystals. Some algaecides also use sodium bromide.


Copper sulfate is occasionally used to kill algae in pools.


Alum (potassium aluminium sulfate) is used to clear up the water in pools.


Calcium chloride crystals (ice melt) is used to increase hardness in pool water.


Sodium thiosulfate is used to decrease chlorine level in pools. 


Share this post
Repost0
July 1 2012 7 01 /07 /July /2012 02:15

Yesterday, I went to see some fireworks that my town was having. As always, I thought of the chemical compositions of the fireworks while watching the display.


Fireworks are colored using several elements. A green coloration is obtained using barium or some forms of copper. A rarer blue coloration can also be obtained by copper. A purple coloration is produced with potassium, while an orange coloration is produced with calcium. Either lithium or strontium can be used to create a red color. Combinations of colors are produced by layering these various elements in the pyrotechnic mixture. As it burns up, the different colors are shown.


Some fireworks leave streams of glowing particles behind or produce an array of sparks. If the particles are a dull orange, then they consist of iron filings. If they are bright white, they are most likely magnesium. If they are slightly orange, they could be either aluminium or titanium powder.


My favorite fireworks were the flash powder ones. While I am not definite about the composition, bright flash powders are often made using magnesium powder and potassium perchlorate. This mixture is quite stable until it is ignited, after which it burns rapidly. Enclosing this easily makes a bright spot in the sky and a loud bang as the enclosing material is torn apart, similar to a flash-bang grenade.


Plain and simple chemistry is not the only element necessary to create a dazzling fireworks display. The physical arrangement of fireworks can provide a variety of effects. Here are several pages detailing the physical aspects of fireworks.


Enjoy the fireworks this holiday season (for US readers) and remember the intricacies of chemistry that produce the dazzling effects.

Share this post
Repost0
June 23 2012 6 23 /06 /June /2012 21:10

My ultimate goal was to form the dioxide of both elements. With that goal in mind, I performed a wide range of experiments but failed to obtain the goal in either case.


My tellurium came in crystalline chunks. These were extremely brittle and somewhat conductive of electricity.  My selenium came in glassy beads. These were also brittle but did not conduct electricity. They are probably the black allotrope of selenium.


When either element is heated, it volatilizes before it burns. This is because neither of these elements are metals. Tellurium has a similar appearance to a metal but different properties. It melts at 450 C, well below the temperature necessary to burn it. Selenium is even worse. It has a melting point of about 220 C, and the fumes produced by the volatilization are very toxic. Therefore, it is practically impossible to create the oxide using the heat of a propane torch in an open atmosphere.


Here is the video of a piece of tellurium being heated on a piece of brick to prevent the highly mobile liquid tellurium from falling out of anything. Volatilization occurs, tellurium is deposited, but no oxidation occurs. The flame test of tellurium vapor is visible as a green coloration.


When tellurium is heated on an iron loop, it melts and quickly falls through the loop. Again, very little oxidation occurred.  The hot tellurium only left the vapor behind, not any white oxide.


Tellurium, though conductive to some degree, does not form the dioxide when connected to the anode of an electrolysis apparatus. It does form an interesting purple ion when connected to the cathode. This reacts with water to produce a black water-insoluble solid. This solid is soluble in hydrogen peroxide. I thought that this might be a finely divided form of tellurium, but I do not see any insoluble tellurium dioxide precipitating out as the substance is oxidized. Selenium does not conduct electricity in this state so electrolysis is out of the picture. It is very difficult for tellurium due to its brittleness. Any gentle pressure on the metal causes it to fracture and crumble, making electrolysis a painstaking procedure and a waste of tellurium, of which I only have 1 gram.


Here is a video of the electrolysis of tellurium. The tellurium is in the solution and is being contacted with a carbon rod. Uniquely, most of the current flows into the tellurium. A faint smell of hydrogen telluride was noticeable. There was a film of elemental tellurium floating on the surface of the solution after the experiment was complete, indicative of the oxidation of the gas.


I next tried simple dissolutions. Tellurium did not appear to dissolve in a mixture of hydrochloric acid and hydrogen peroxide, nor did it dissolve in sodium hypochlorite, and hypochlorous acid. Selenium dissolved in sodium hypochlorite but did not appear to dissolve in hydrogen peroxide, or the hydrogen peroxide hydrochloric acid mixture. The red allotrope of selenium is supposed to dissolve in hydrogen peroxide, forming the dioxide. Because of this, I tried to form this allotrope. Blowing hot dilute selenium vapor onto a cold surface forms the red allotrope of selenium. However, this process consumes a tremendous amount of fuel and produces a large amount of highly toxic vapors. Because I am not equipped to do this, I wrote off this process as unattainable. So I tried to melt black selenium in a dish and pour it into water. This formed a small amount of red selenium on the surface of the re-formed black selenium beads. It dissolved in added hydrogen peroxide but there was no residue. This was expected due to the extremely small amount of this form of selenium.


After a few more experiments and repetitions of previous experiments, I gave up on finding an easy route to selenium dioxide with my limited equipment and materials. Until I obtain some barium nitrate and sulfuric acid to make nitric acid, I will hold off on any anticipated experiments with these metals. This shows the error in trying to use transition metal chemical pathways (acid dissolution, burning in air, etc.) to perform the same results on semimetals and nonmetals.

Share this post
Repost0
June 19 2012 2 19 /06 /June /2012 21:01
As I gift I purchased two more elements, strontium and selenium. This completes both the alkaline earth metal and chalcogen columns on the periodic table. This means that I have all of the non-radioactive elements in pure form.
 
The strontium came in a nice sealed bottle. It was filled with mineral oil to the top. The 5 gram piece was in two pieces. Because of strontium's low density of 2.64 grams per cubic centimeter, the volume of strontium was much larger than I expected.
 
Strontium-under-oil.JPG
Here is some of the strontium that I removed from the bottle and placed in a glass vial. The surface is golden-tinged when freshly cut but quickly darkens. Strontium is not very soft; it is difficult to cut with a knife but flakes apart like cooked meat along the crystalline fractures. It is quite reactive with water, fizzing violently. The strontium hydroxide dissolves at first but soon begins accumulating due to its low solubility. This also inhibits the reaction with water.
 
 
Strontium burns with a bright red flame in air. The combustion occurs more easily than with calcium. Just like with the other alkaline earth metals, white strontium oxide remains behind.
 
Of course, strontium forms colorless compounds with a bright red flame coloration. I keep my strontium as the carbonate and as the metal.
Selenium is another story. I got 5 grams of black selenium granules with the strontium shipment. A nonmetal, selenium is brittle, black, and nonconductive. It softens in boiling water and easily melts with a small amount of heat, forming a mobile dark liquid. The vapor pressure from selenium at this temperature is significant. A rotten smell is noticed from this vapor.
Selenium.JPG
On further heating, a blue flame of excited selenium vapor is given off, as well as white selenium dioxide fumes. The toxic fumes smell like garlic. Deposition of dilute selenium vapor produces the red allotrope of selenium, while concentrated vapor contacting a cold surface produces the black allotrope.


Both of these elements together cost $26 from Gallium Source, including shipping.


Share this post
Repost0
June 17 2012 7 17 /06 /June /2012 00:41
I heard from NurdRage's excellent video (http://www.youtube.com/watch?v=BliWUHSOalU) that one can easily extract lithium metal from commonly available Energizer lithium - iron disulfide batteries. So I decided to go and purchase some of these batteries. There are actually two grades of these batteries. The Advanced grade has significantly greater power than an alkaline battery and increased shelf life (10 years). The Ultimate grade has slightly greater power than the Advanced grade and has a 15 year shelf life. Because my goal was extracting the lithium and I wanted to purchase the largest amount of lithium for the money, I purchased 4 Advanced AA batteries for 7.46USD at Wal-mart. The batteries were quite a bit lighter than alkaline batteries (lithium being the lightest metal known).
 
The next day, I decided to tear open one of the fully charged batteries. These batteries contain lithium metal and iron disulfide (pyrite) as electrodes. Due to my past experience with ripping open batteries, the battery came apart like a charm. It hardly required 5 minutes to open it. (By comparison, the extremely tough sub-C nickel-cadmium batteries in cordless drill battery packs took me about 30 minutes to open.) The lithium almost immediately fell out from between the electrolyte membranes. It was silvery gray but quickly turned golden, then greenish, and gradually began darkening from there. I quickly rolled it up (it was very soft, malleable, and flexible and warm from reactivity with the air) and placed it in some mineral oil I stole from my strontium storage container. It floated to the top, as I expected, but still very little of the lithium was above the liquid due to the container's design.
 
The iron disulfide stunk like hydrogen sulfide, but did not dissolve to any significant extent in hydrochloric acid. Therefore, it was regarded as useless and discarded.
 
Soon after I decided to try my first experiment with the lithium. I took a large piece of it and placed it on the bottom of a burning place. I had previously melted selenium on the opposite side in an attempt to form red selenium. Some selenium adhered still to the plate. Despite that, I placed the lithium on the plate and ignited it with a propane torch.
 
 
The mineral oil ignited first, which soon ignited the lithium. The lithium shrunk, melting, in the flame. (And this is the highest melting of the alkali metals, the hardest, and the toughest. ) The white glowing spots finally manifested themselves into a real flame. In the video, the bright bottom part of the flame is the burning lithium. The long dim flames are the mineral oil combustion, which ceases about half-way into the video. The lithium burns up, leaving behind glowing formations of white lithium oxide ash. (By the way, this ash absorbs carbon dioxide from the air quite well, to the extent that a hydrated form is used in some spaceships to absorb the astronaut's exhalations.)
 
However, on the dark underside of the plate, sinister events were occuring. The selenium melted due to the heat of the combustion (selenium has a low melting point of 221 Celsius). Selenium has a high vapor pressure, causing evaporation from the dish and subsequent deposition on the floor. High concentrations of selenium vapor resulted in a black deposit, while low concentrations resulted in a red deposit. One piece of selenium actually dripped from the dish's underside onto the floor. Selenium vapors are also very toxic, making it difficult to work with. Fortunately, this was done in a well-ventilated place, making the fumes less of a concern than the stain. I took hydrogen peroxide and a wash cloth and easily scrubbed all of the red stains off the floor, but the black metallic looking spot which was the real concern remained. I used a torch to try to spread it out, which was a bad idea due to the amount of toxic selenium vapor released. This made it necessary to wait until the selenium fumes were completely ventilated. Again the hydrogen peroxide was applied and the floor scrubbed, without much mitigation of the black spot. A scrub brush and a scraper were both applied, but without effect. Just in time, however, I recalled an earlier experiment where the size of a selenium bead shrunk significantly when immersed in bleach, hinting that selenium is soluble in sodium hypochlorite. Therefore, I decided to apply bleach. It worked wonderfully. The selenium stain disappeared in a minute, and nothing remained except for a slightly whiter spot on the concrete.
 
I then dissected another battery which I almost completely depleted by running a 200 mA flashlight lamp on it for 24 hours. The battery had a nominal voltage of 0.12 V and a maximum current of 20 mA. I opened it up. Just about all of the lithium foil was completely reacted. The black iron looked the same (the iron disulfide is reduced to iron). The lithium sulfide was only a smeary residue on the electrolyte papers. I expected a large amount of lithium sulfide to be present, so I placed it in water. I was greeted with the hydrogen release from all of the left-over lithium inside the electrolyte "paper". The solution turned black and has remained black ever since, even after filtering. It looks like my lithium sulfide is irreversibly contaminated and useless. Two dollars almost went down the drain. However, there was an extra piece of lithium in the battery that had escaped the depletion reaction. I decided to react it with water to obtain some lithium hydroxide. To do this, I took a plastic paint mixing container and placed a significantly sized piece of lithium in it. I then took a garden hose sprayer and sprayed a fine stream of water into it. Unexpectedly, the lithium ignited, spewing out a long red flame and melting a hole in the bottom of the container as all of the water was consumed and the flame's heat had its effect on the container. It was fortunate that this experiment was done outdoors on a concrete patio instead of on some flammable object. The lithium ignition occurred in several steps. My hypothesis is that a piece of the lithium in the upper part of the container was temporarily covered in water. The water reacted as it ran off the lithium, producing heat and steam. Despite lithium's high heat capacity, it does not exceed that of water, so the lithium easily heated to a high temperature in the absence of the water. Steam-laden hydrogen passing over the metal from a reaction in the bottom of the container heated the metal so much more. Eventually it reached the ignition point. The lithium ignited, igniting in turn the hydrogen gas. The hydrogen gas was ignited in a steady stream, enabling it to ignite more of the lithium. A runaway reaction occurred, during which the lithium melted through the container.
 
Excited by the prospect of the lithium's reactivity, I took another piece of lithium, placed it on a brick, and emptied an eyedropper full of water on it. No ignition occurred. This was because of the lack of the specific circumstances stated beforehand which were used to get ignition. No hydrogen laden steam passed over any portion of the lithium, and there was way too little water.
 
 
Not to be discouraged, I tried again two more times. Each time was a failure. Finally, I decided to reproduce original conditions. Original conditions produced (nearly) original results. Take a watch. The steam hid much of the reaction from view.
 
 
I then hit upon a novel idea. Why not combine my two previous experiments and drop lighted lithium into water? This should produce a more vigorous reaction. I was right. The first experiment involved a small piece of lithium. It was lighted and dropped into the water. The hydrogen immediately caught fire and kept burning throughout most of the video. The lithium reacted completely, leaving only a red-hot sphere of lithium oxide floating on the water by the Leidenfrost effect. When the temperature dropped to a certain extent, it fell down to the bottom with a fizz. This reaction was quite similar to the reaction of a similar piece of sodium with this amount of water.
 
 
 However, I was not satisfied with such a small amount of metal. I decided to step it up a bit. I used a larger piece of lithium and got it burning more thoroughly before dropping it into the water. The lithium ignited the hydrogen with a pop, burning brilliantly for a few seconds. However, due to the reaction thinning out the foil, the vigorous bubbling of hydrogen, and the heat of the flame, the lithium foil broke into several pieces and exploded, shooting gorgeous bits of burning lithium up to six feet into the air. This reaction is more worthy of potassium metal than lithium.
 
I was done with the bangs and flashes of the alkali metals for now but wanted to catch a more close-up video of the combustion of lithium. I did so with a small piece of foil.
 
The mineral oil first caught fire, melting the lithium. Unlike the alkaline earth metals, the alkali metals have a low melting point and generally melt before burning. The lithium solidified into a blob and began burning. The white flame gradually became brighter as the lithium was completely converted to the oxide. Then it turned red due to the flame spectrum of lithium oxide and faded as the lithium burnt up. The lithium oxide ash appeared in an interesting lump, which I immediately preserved from atmospheric attack in a glass vial, though in a crumbled state. The formation shown here is very delicate.
Lithium oxide
Since I wanted to keep some lithium for further experiments without resorting to breaking open another expensive battery, I ceased experimenting with the metal after this.
If you have any ideas about what do with lithium, drop a note in the comments section below.     
Share this post
Repost0
May 26 2012 6 26 /05 /May /2012 23:12

I recently received yttrium and erbium as a generous gift from one of my family members. Here are the metals in their original containers.


Yttrium-and-erbium.JPG 

As these are rare earth metals, they look and react similarly. However, erbium forms pinkish compounds, while yttrium forms colorless compounds. Here are more detailed photos of these metals. The upper photo is of erbium, while the lower is of yttrium.


Erbium.JPG

Yttrium.JPG


These metals were purchased from Metallium, Inc. (http://elementsales.com ) They have a wide range of elements available in several forms for moderate price.

Share this post
Repost0
May 21 2012 1 21 /05 /May /2012 16:30

The flammability of magnesium is well-known. Magnesium ignites around 500 degrees Celsius, burning with a temperature of 3100 degrees Celsius. It is highly reactive, burning in oxygen, nitrogen, and carbon dioxide. It also reacts with water and can burn in small amounts of it. (Large amounts of water still extinguish small amounts of magnesium.)


Curls of magnesium can be ignited by a 3 inch magnifying glass on a piece of wood. They can also be ignited by sparks from burning ferrocerium, the material used to ignite cigarette lighters. This is the principle behind the camp firestarter.


Magnesium burns vigorously when mixed with most metal oxides. Even sodium hydroxide burns with magnesium, forming impure sodium metal. Metal oxides of less reactive metals such as copper forms violent mixtures with magnesium powder. These mixtures burn best when finely powdered and ground together.


Magnesium is extinguished quite rapidly in an enclosed location, but not before it burns some nitrogen, forming magnesium nitride. This produces an ammoniacal smell when reacted with water.


Burning magnesium powder explodes when struck by a fine stream of water. This can be dangerous, especially if the original intent was extinguishing the fire.


When a magnesium strip is placed in water and ignited at the top, it burns down until it hits the water, where it continues burning for a while, forming hydrogen gas from the water. Eventually, the water pulls enough heat from the magnesium to stop the combustion.


Magnesium does not readily form sparks when ground in air, but I did get a few sparks. They could have been from impurities (e.g. iron) on the grinding wheel.

Share this post
Repost0